Hello, Beauties !! I hope you enjoyed your Christmas. My mini family and I enjoyed our day with friends and food ( yummy ) ha-ha. This year all I wanted was one machine and I am pretty sure you can tell by the title what machine that is. The Silhouette Cameo is very popular and if you do not know what it is I will give you a brief description.
It is just like your typical printer, but it cuts. Using a small blade it cuts paper, cardstock. fabric, vinyl, and etc… If you would like to know more, check out their website Silhouette America
. There are endless options for what you can do and create with it. I was super excited once I knew this would be my Christmas present. I say my husband did an awesome job this year. Once it arrived, I did not want to open it, let alone start on anything because I was scared I would not do anything right. After doing a lot of research on Pinterest I put on my big girl panties and started on my first project.
For the first project I wanted to start off doing something easy so I made triangles for the nursery. Living overseas, it is hard to get the craft supplies you need. Plus, being the girl I am, I hate waiting for anything in the mail. So once I was told they sold vinyl at our local craft store I went there. Before starting on this I had to remove the fabric triangles I placed on the wall a few months ago. Sorry, I did not do a tutorial or show pictures, but this was a nightmare. Long story short I had to cut each triangle by hand, then made sure they stayed on the wall. It was not the brightest idea because we live in a very humid area and they did not stick for long. After taking them down and cleaning the wall I was ready for my stickers. Before I show you the wall I would like to give you a mini-tutorial just in case you would like to do this also.

Material:
-
Silhouette Machine or Extractor Knife Scissors
-
Vinyl
-
Cutting Mat
-
Clean Wall
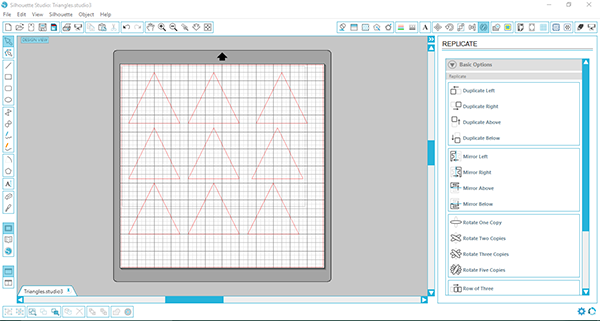
First, I open Silhouette Studio to make my triangles. This sounds very easy, but it was not. It took me a while to make them the perfect size and also to figure out this software being I am a beginner. I used the “Polygon” tool and made the triangles 3in. by 3in. Then I clicked on it and open the “Replicate” window to make my rows/columns.
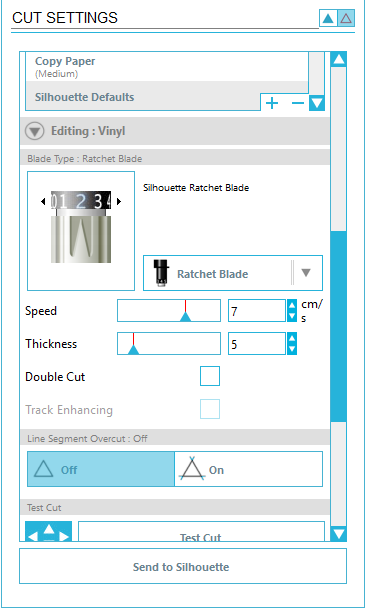
After I finished making the triangles I had to change my cutting setting to the following: blade: 2, speed 7, and thickness: 5. Once I got everything ready to go I cut my vinyl into 12×12 sheets and placed them in my machine. Being that this was my first time using my machine I was amazed at how everything worked. Then, once it finished cutting my husband and I cleaned the wall. This took at least a few days because the starch from the fabric left marks. I could see where each triangle was and it was driving me crazy. Once everything was dry I made a stretch of where I would like the triangles. I set the mood by listening to Spotify Ha-ha and started on the nursery wall.
Here goes the finished look. We are waiting for his bedding to arrive it should be here this week. I will make sure I update you guys on the nursery progress and DIYs.
